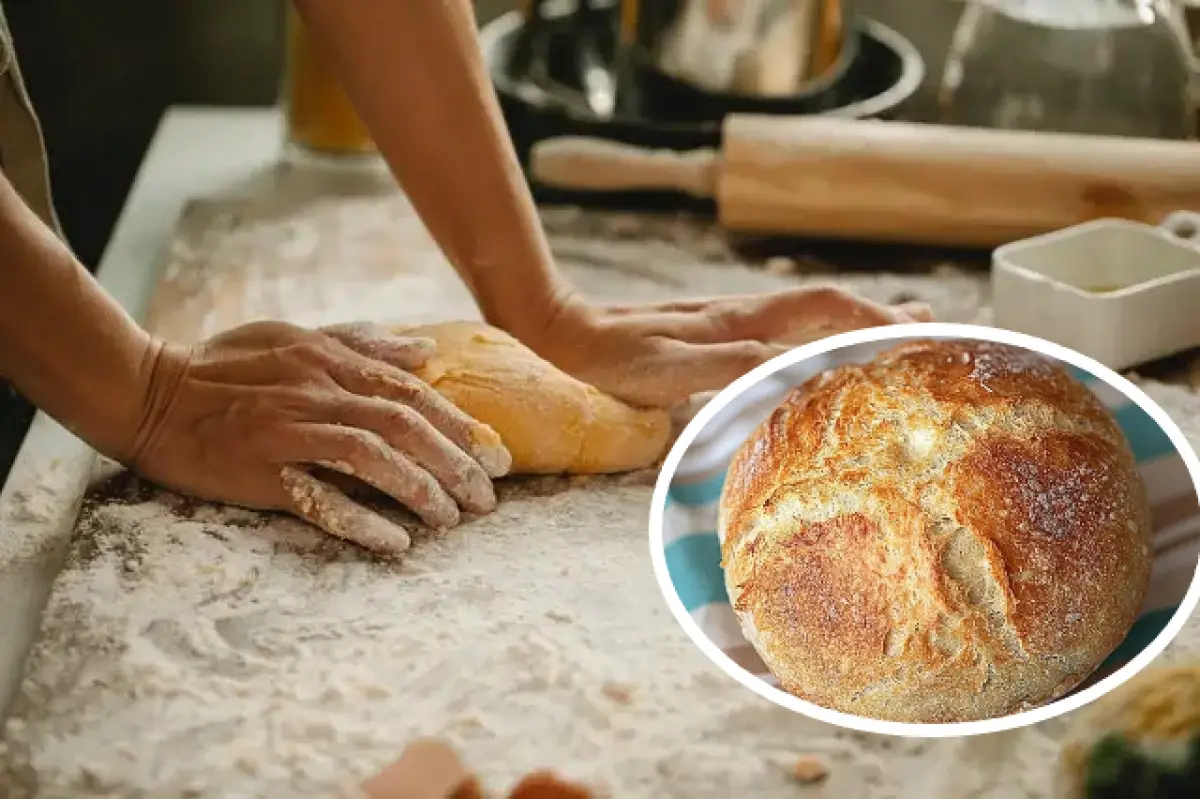
Homemade bread is one of the most comforting treats you can create in your own kitchen, and making it doesn’t have to be complicated. In fact, with just four basic ingredients, you can bake a loaf that rivals artisan bakery bread—complete with a crunchy crust and a soft, airy interior. This simple, no-knead recipe is perfect for beginners who want to experience the joy of making their own bread without the need for expensive equipment or advanced baking skills.
In this guide, we’ll walk you through everything you need to know about making 4-Ingredient No-Knead Bread, from the ingredients and step-by-step instructions to expert tips, creative variations, and troubleshooting common issues. Whether you’re a seasoned baker or new to the kitchen, this recipe is designed to be accessible and satisfying. So, let’s dive in!
I. The Allure of Homemade Bread
There’s something magical about the aroma of freshly baked bread wafting through your home. Making your own bread allows you to control the ingredients, ensuring a healthier and more delicious alternative to store-bought loaves. This 4-ingredient recipe is especially appealing because of its simplicity—it requires minimal prep time and no kneading, relying on time and temperature to develop flavor and texture.
Baking bread at home isn’t just about nourishment; it’s also a creative and rewarding experience. Watching the dough transform as it ferments, then emerging golden-brown from a preheated Dutch oven, is a testament to the power of patience and the beauty of basic ingredients coming together.
II. Understanding No-Knead Bread
A. What Is No-Knead Bread?
No-knead bread is a modern twist on traditional baking methods that eliminates the labor-intensive kneading process. Instead of working the dough by hand, you mix your ingredients and allow time for natural fermentation to develop gluten and flavor. This method not only simplifies the baking process but also yields a bread with a uniquely crisp crust and a soft, open crumb.
B. The Benefits of the No-Knead Method
-
Simplicity: With only four ingredients and no need for kneading, this recipe is incredibly beginner-friendly.
-
Flavor Development: Extended fermentation time enhances the bread’s flavor, creating a complex, tangy taste that mimics artisanal loaves.
-
Texture: The no-knead method produces a crust that is both crunchy and deeply flavorful while maintaining a light and airy interior.
-
Low Equipment Requirement: You don’t need a mixer or special dough kneader—just a bowl, a spoon, and a Dutch oven or heavy pot.
III. Ingredients and Equipment
A. Essential Ingredients
For a standard 1-loaf recipe, you will need:
-
3 cups (360g) All-Purpose Flour: You can also use bread flour for a chewier texture.
-
1 ½ teaspoons Salt: This is crucial for flavor and controlling yeast activity.
-
½ teaspoon Instant Yeast: Instant yeast is preferred because it mixes directly with the flour without needing to be dissolved first. (If using active dry yeast, dissolve it in warm water before mixing.)
-
1 ½ cups (360ml) Warm Water: Ideally around 100°F (38°C) to activate the yeast without killing it.
Optional:
-
1 tablespoon Honey or Sugar: For a slightly sweeter flavor, though this is not necessary for the basic recipe.
B. Equipment You’ll Need
-
Large Mixing Bowl: For combining your ingredients.
-
Whisk or Spoon: To mix the dry ingredients.
-
Plastic Wrap or Damp Towel: For covering the dough during fermentation.
-
Dutch Oven or Heavy Lidded Pot: Essential for creating a steamy environment that gives the bread its signature crust.
-
Parchment Paper: For easy transfer of the dough into the hot pot.
-
Oven: Preheated to 450°F (230°C).
IV. Step-by-Step Instructions
Step 1: Mixing the Dough (Approx. 5 minutes)
-
Combine Dry Ingredients: In your large mixing bowl, whisk together the flour, salt, and yeast until evenly distributed.
-
Add Water: Pour the warm water into the bowl and stir with a spoon or spatula until the mixture forms a shaggy, sticky dough. Make sure there are no dry spots remaining.
-
Initial Inspection: The dough will be wet and sticky—this is normal. It’s much looser than traditional bread dough because you’re relying on time to develop the gluten.
Step 2: Fermentation and Rising (12 to 18 hours)
-
Cover the Bowl: Cover the bowl with plastic wrap or a damp towel. This prevents the dough from drying out and allows it to ferment properly.
-
Let It Rise: Place the bowl in a room-temperature area and let the dough sit undisturbed for 12 to 18 hours. Overnight is ideal. During this time, the dough will expand and develop a bubbly texture as the yeast ferments the sugars.
-
Resulting Texture: After this long fermentation, the dough should be visibly bubbly and nearly doubled in size, with a slightly domed top.
Step 3: Shaping the Dough (Approx. 30 minutes)
-
Flour Your Work Surface: Dust your hands and a clean surface lightly with flour. This will prevent sticking when you shape the dough.
-
Shape Into a Loaf: Gently turn the dough out onto the floured surface. Without deflating it too much, shape it into a round loaf. The dough is delicate, so handle it gently.
-
Rest Before Baking: Place the shaped dough onto a piece of parchment paper. Cover it with a towel and let it rest for about 30 minutes. This short rest allows the dough to relax and can result in a better rise during baking.
Step 4: Baking the Bread (Approx. 45 minutes)
-
Preheat the Oven and Dutch Oven: Preheat your oven to 450°F (230°C). Place your Dutch oven (or heavy pot) with its lid inside the oven to heat up. The preheated pot will create a steamy environment when the dough is placed inside.
-
Transfer the Dough: Once the oven is preheated, carefully remove the hot Dutch oven using oven mitts. Lift the dough with the parchment paper and place it into the pot. Be cautious, as the pot will be extremely hot.
-
Bake with the Lid On: Cover the pot with its lid and bake for 30 minutes. The lid traps steam, which is essential for developing a crispy crust.
-
Finish Baking Uncovered: After 30 minutes, remove the lid and continue baking for an additional 10-15 minutes. This step allows the crust to become deeply golden and crunchy.
-
Cool Before Slicing: Once baked, carefully remove the bread from the pot and place it on a cooling rack. Let it cool for at least an hour before slicing. This cooling period allows the interior to set properly.
V. Tips and Tricks for Perfect No-Knead Bread
A. The Importance of a Hot Dutch Oven
Preheating your Dutch oven is key to creating the steam needed for a crispy crust. The initial high heat helps to form the crust quickly, locking in moisture and flavor.
B. The Magic of a Long Fermentation
The 12 to 18-hour fermentation process is crucial. It develops flavor, improves texture, and increases the nutritional availability of the flour. If you have time, let your dough ferment longer for an even richer taste.
C. Customizing Your Bread
One of the best parts about this recipe is its versatility. Once you’re comfortable with the basic formula, you can add:
-
Herbs: Fresh rosemary, thyme, or basil for an aromatic twist.
-
Cheese: Sprinkle grated Parmesan or cheddar on top before baking for a savory crust.
-
Seeds: Add flaxseeds, sesame seeds, or sunflower seeds for extra crunch and nutrition.
D. Troubleshooting Common Issues
-
If the Dough Is Too Sticky: Add a little more flour during the shaping process, but be careful not to overdo it; too much flour can make the bread dense.
-
If the Crust Is Not Crispy Enough: Make sure your Dutch oven is properly preheated, and consider baking uncovered for the final 10-15 minutes.
-
If the Bread Doesn’t Rise Enough: Check your yeast’s expiration date and ensure the water is at the right temperature (around 100°F). Cooler water can slow fermentation, while water that’s too hot can kill the yeast.
VI. The Versatility and Joy of Homemade Bread
Homemade bread is not just a staple food; it’s an experience that brings people together. Whether you’re sharing a warm slice with family at breakfast or serving it as a side with your favorite soup, the satisfaction of baking your own bread is unmatched. This recipe is designed to be accessible for beginners, yet it also provides a canvas for creative experimentation.
A. Embracing Simplicity
The beauty of this 4-ingredient no-knead bread lies in its simplicity. With just flour, water, yeast, and salt, you can create a loaf that is both flavorful and textured. This simplicity makes it ideal for those who may be intimidated by more complicated baking recipes.
B. A Recipe for Mindfulness
Baking is an art that requires patience and mindfulness. Allowing the dough to ferment for several hours can be a meditative process, giving you a chance to step away from the busyness of everyday life and focus on creating something wholesome and delicious.
C. Sharing Your Creation
One of the most rewarding aspects of baking bread is sharing it with others. Homemade bread has a way of bringing people together—whether it’s at family dinners, community potlucks, or casual gatherings with friends. Each slice carries the effort, love, and care that you put into the baking process, making it a truly personal treat.
VII. Final Thoughts
This 4-Ingredient No-Knead Bread recipe is a testament to the power of simplicity in the kitchen. It transforms basic pantry staples into a loaf that is not only nutritious and delicious but also a work of art in its own right. With minimal equipment and little hands-on time, this recipe proves that you don’t need to be a seasoned baker to produce artisan-quality bread at home.
From the long fermentation that unlocks rich, complex flavors to the magical transformation in a preheated Dutch oven, every step of this recipe is designed to bring out the best in your ingredients. Whether you’re a beginner looking for a foolproof recipe or an experienced baker eager to experiment with new flavors, this no-knead bread offers endless possibilities for creativity and enjoyment.
So, gather your ingredients, set aside some time for fermentation, and embark on a delightful baking adventure. Enjoy the process, savor every slice, and remember that the journey of making bread is as satisfying as the final product.